Using Perspectives
What is a Perspective?
A Perspective is a saved way of looking at your tickets.
You can think of a perspective as a custom view or filter that decides:
- which tickets you see
- and the order they appear in
For example, you might have perspectives like:
- My Open Tickets
- High Priority
- Waiting on Customer
- Recently Updated
Perspectives help you focus on the tickets that matter to you right now, without needing to search or filter every time.
The Perspectives Panel
The Perspectives panel appears on the left-hand side of the screen.
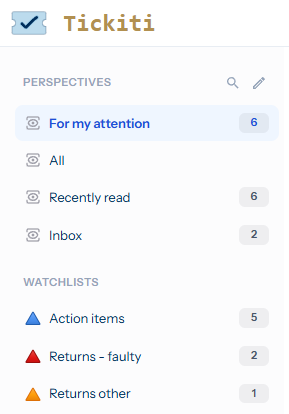
This panel shows the perspectives that are currently available to you. Selecting a perspective immediately updates the ticket list.
Selecting a Perspective
- Click on a perspective name to activate it.
- The selected perspective is highlighted.
- The ticket list updates instantly.
Some perspectives may show a count badge, indicating how many tickets currently match that perspective.
Adding and Removing Perspectives from Your Panel
You can choose which perspectives appear in your panel.
Editing Your Perspective List
- Click the Edit (pencil) icon in the Perspectives panel.
- You can now:
- remove perspectives you no longer want
- add existing perspectives to your panel
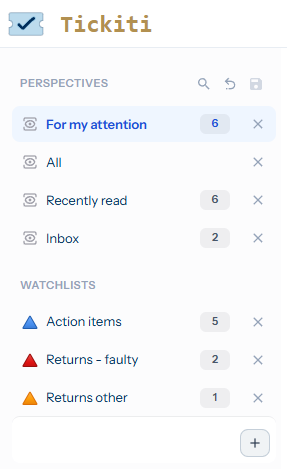
Removing a Perspective
- In edit mode, click the remove (×) icon next to a perspective.
- This only removes it from your panel — it does not delete the perspective.
Adding Existing Perspectives
- In edit mode, click Add.
- A list of available perspectives opens.
- Select one or more perspectives.
- Click Use selected to add them to your panel.
Saving or Undoing Changes
- Click the Save (💾) icon to keep your changes.
- Click the Undo (↶) icon to discard changes and return to the previous list.
Changes are only applied once you save.
Creating a New Perspective
If the perspective you need doesn’t exist yet, you can create a new one.
- Choose Add new from the “Use perspectives” screen.
- A panel opens on the right where you can define the new perspective.
- Once saved, the new perspective is added to your panel.
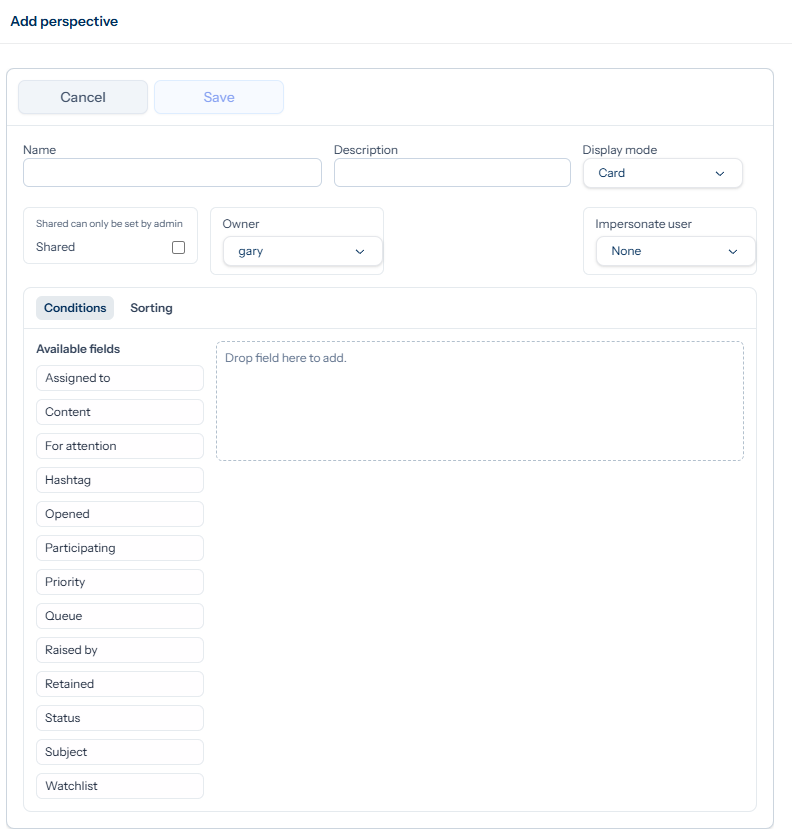
Creating a new perspective allows you to define:
- which tickets it includes
- how they are sorted
- optional ownership or impersonation rules
➡️ For detailed instructions on creating and managing perspectives, see the separate document:
Managing Perspectives (coming soon).
Temporary Perspectives
Sometimes you may select a perspective just to quickly view it.
- These appear temporarily in your list.
- They are marked as Temporary.
- They are not saved unless you explicitly add them to your panel.
This is useful for quick checks without changing your regular setup.
Tips for Working with Perspectives
- Start with a small number of perspectives you use regularly.
- Create different perspectives for different workflows (e.g. triage vs follow-up).
- Use counts to quickly see where work is building up.
- Don’t worry about experimenting — you can always undo changes before saving.
Summary
- Perspectives control which tickets you see and how they’re shown.
- The Perspectives panel lets you switch views instantly.
- You can add, remove, and reorder perspectives in your panel.
- You can create new perspectives when needed.
- Advanced setup is covered separately in Managing Perspectives.