Authentication and tokens
This article and the rest of the API documentation in this section are written for a technical audience — integrators and developers connecting external systems to Tickiti. Familiarity with HTTP, REST, JSON and bearer-token authentication is assumed.
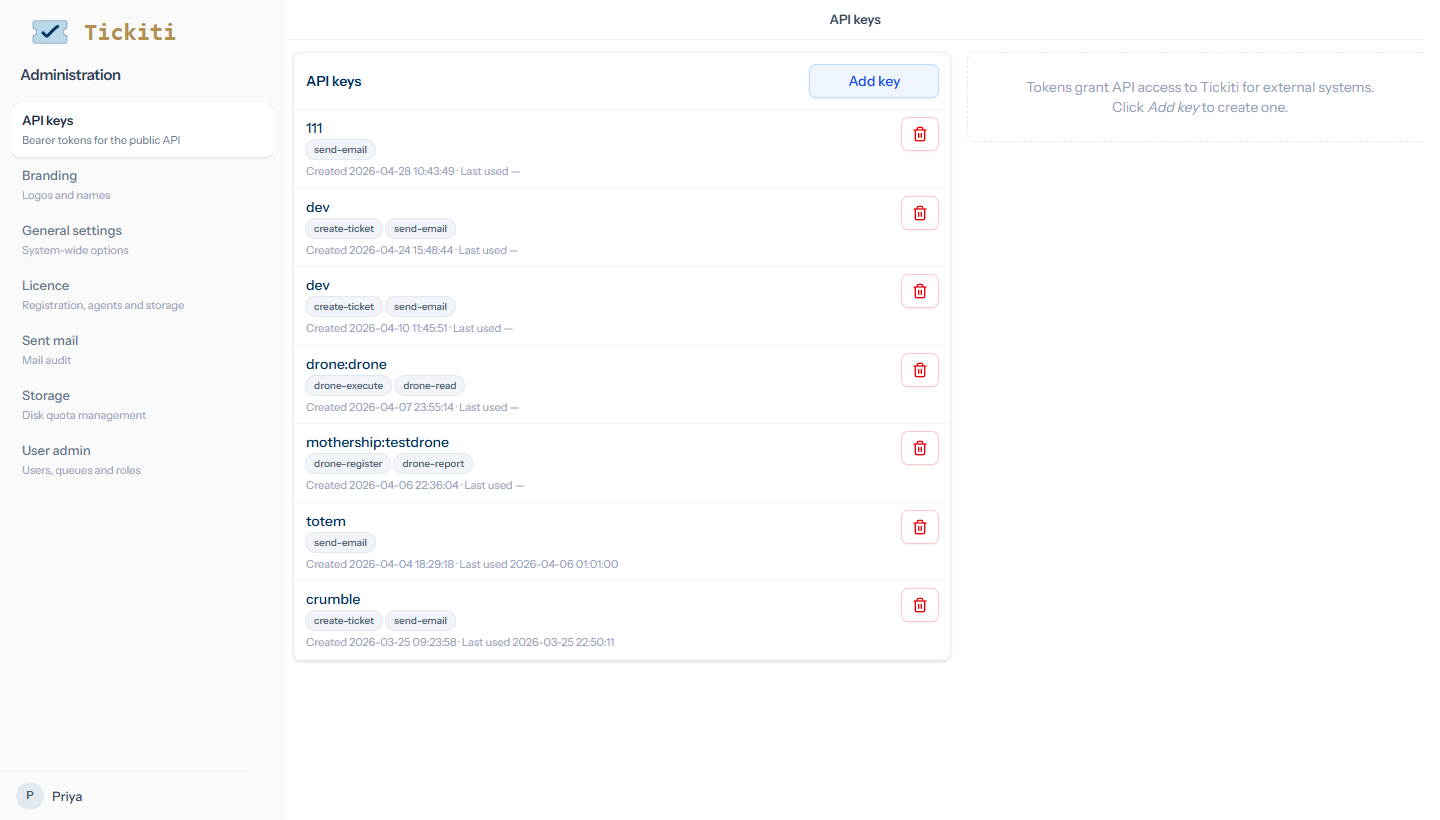
The Tickiti API authenticates with bearer tokens. Each token has a description (so you can tell them apart) and a set of abilities that gate which endpoints it can call. Tokens are managed at Administration → API keys in the admin user-menu dropdown. The page is admin-only and additionally requires the can_manage_api_keys plan capability.
The four abilities
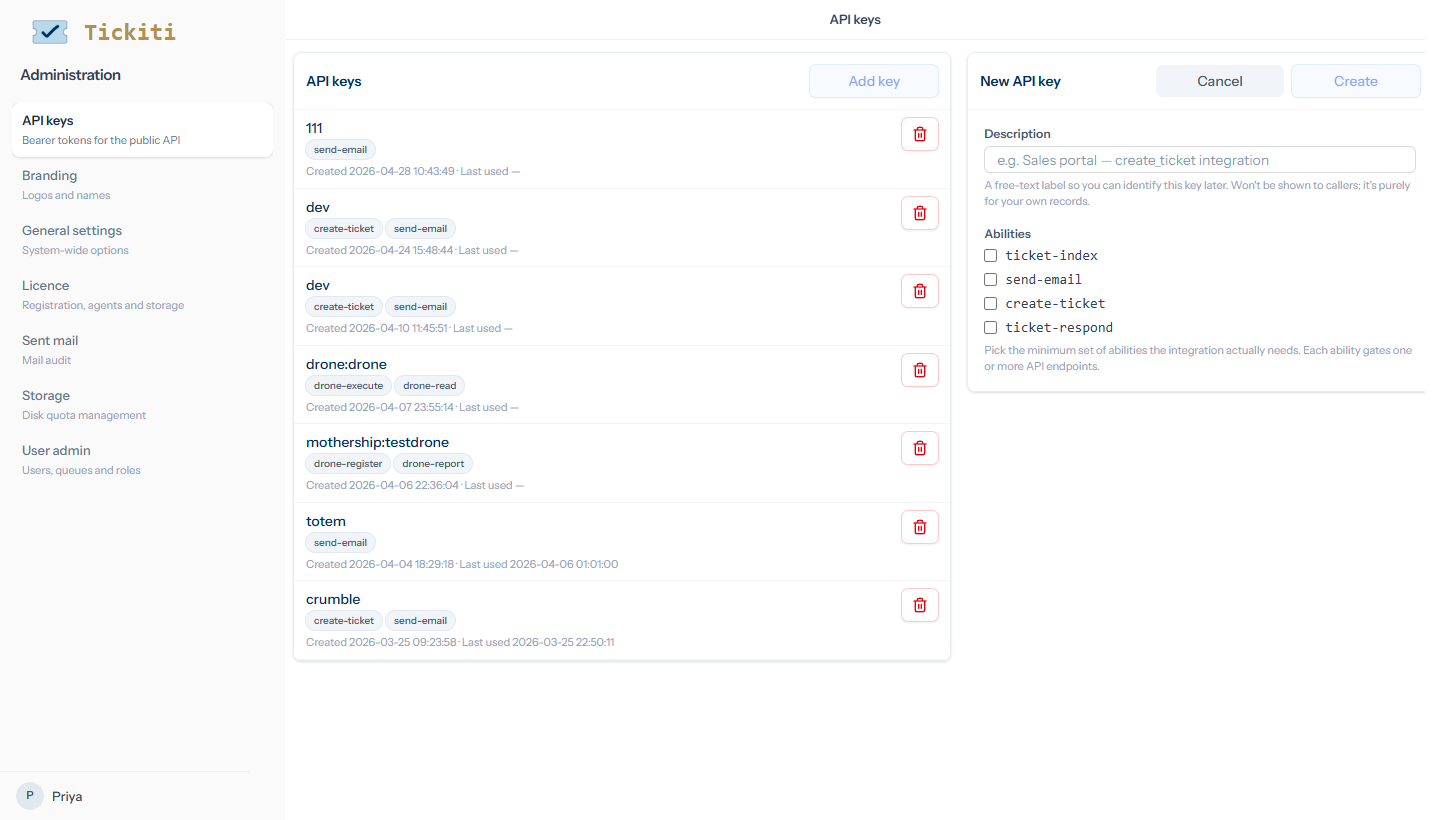
ticket-index— read-only listing of tickets via the API.send-email— send one-off emails via/api/send_email.create-ticket— create new tickets via/api/create_ticketor/api/tickets/create.ticket-respond— post responses to existing tickets via/api/ticket_respondor/api/tickets/{number}/respond.
Pick the minimum set the integration actually needs. A CRM that only wants to file new tickets needs create-ticket and nothing else; a notification gateway that only sends emails needs send-email.
Creating a token
- Open Administration → API keys.
- Click Add key.
- Give it a description that makes it identifiable later — e.g. Sales portal — create_ticket integration.
- Tick the abilities the integration needs.
- Click Create. Tickiti shows the bearer token once; copy it into your integration’s secret store immediately.
Using a token
Send the token in the Authorization header on every request:
Authorization: Bearer 14|wfNxV4zX8PqR9K2j7L6M5N0BeQa3D1cGtYTokens are bound to a built-in system user, not to a specific staff account. They survive staff coming and going from your team. Anything an integration does via the API attributes to the system user on the staff side of the conversation.
Rotating and revoking
- To rotate: create a new token with the same abilities, switch the integration over, then delete the old one.
- To revoke: click the trash icon on the row in API keys. The token stops working immediately on the next request.
- To audit: each row shows a Last used timestamp. Tokens with no recent use are candidates for cleanup.
If a token leaks
Delete the token immediately. Anything an attacker did with it before deletion is in the audit trail (sent emails appear in Mail → Sent mail, created tickets appear with the system user as the staff side). Replace it with a fresh one and update the integration.
Token storage on your side
- Store tokens in your platform’s secret manager (Vault, AWS Secrets Manager, Azure Key Vault, Doppler, etc.) — never check them into git.
- Inject them via environment variables, not config files committed to the repo.
- If you must put a token in a CI pipeline, use the CI provider’s secret feature, not plain text.
Where to go next
- API overview — the API surface and which abilities gate which endpoints.
- Idempotency — the
Idempotency-Keyheader required on write endpoints. - Create ticket API and Send email API — the two most-used endpoints, with full request/response references.